
Building a Portable Wood Bar
We were recently commissioned to build a couple of custom portable bars. We found some great inspiration online and decided to give it a go. This video shows the full build.
The first thing we had to do was build the carcass of the bar. Since the inside of the bar would be open, we started with ¾ inch maple sanded plywood. We don’t have the largest table saw so for this task we broke out our handy track saw. Track saws are great for getting clean, straight cuts. The best part about a track saw is that you are only limited in length by the number of tracks you.


Thankfully we had a great day so we set up some sawhorses outside, clamped down our track and cut our front panel, two sides, the bottom, and a couple of rails.
The assembly process was similar to building any standard cabinet. We used wood glue and panel nails to secure both sides. You will notice that we already have a thin strip of spare wood glued and nailed to the back side of the front panel. That will serve as one length for the counter and ice chest.


Once we have both sides in place we glued and secured the bottom panel. Since this bar will be fairly heavy the bottom panel will run edge to edge with the front and sides resting on top of it. The great thing about this process is that as long as each panel is square, and each edge is flush, you know the cabinet is square.


Once the bottom is in place, we slide the carcass forward and install a 4 inch rail on the inside of the top. This rails serves as an anchor point allowing us to later glue and bolt the bartop in place.
Finally, we installed a six inch rail the same height as the rail in the back. This one is larger simply because it will have less support. It is also the same dimensions as the speed rails we chose for the bar.

From here Mike installed the heavy-duty 5 inch casters we ordered. These wheels will carry 1800lbs so they were a bit over kill but well worth it for the price. Mike marked each hole for the bolts and predrilled holes with a fine drill bit before moving to the larger one to avoid any tear-out on the inside. These wheels came with both nuts and bolts and lag screws. We opted for the bolts but really the screws were large enough to work just as well.


Next we unboxed the ice chest to do a dry fit and make sure I hadn’t screwed up any measurements…..as I’m apt to do. This chest is double-wall insulated, has a removeable lid, and comes with a flexible drain line so you can drain melted ice water out. Thankfully the sink fit perfectly….if not a bit snugly.


From here we had to start covering the outside of our cabinet. Since this was an actual order from a real customer, we wanted to make the edges as polished as possible so we set up the table saw to cut a 45 degree angle and ripped enough boards to cover the four corners. Once the corner pieces were cut to height, we clamped them in place so we could get measurements for the top and bottom pieces of trim. Once clamped in place we brought our trim over and marked it. A quick trip to the miter saw and we could test fit them.


We decided to pocket screw the trim together. We flipped each piece on its face, drilled pocket screws into the back of the corner pieces with our handy little pocket screw jig, and glued and screwed each joint together while they were securely clamped to our worktable.
At this stage we effectively have an oversized frame. A little bit of glue on the back and we can then secure it in place with some clamps and a whole lot of trim nails. This process was replicated on the rest of the sides. This step could have been simplified. We could have just cut and glued each piece of trim in place. The assembled frame does add a bit of strength and stability but on a build like this….probably not strictly necessary.


Then came the tedious and most time consuming part…..the patchwork pattern. This part took the most time and required a lot of steps. We started with rough-cut red oak lumber and faced one side of each board on our jointer. We also turned it on its end and jointed one edge.
We set up our bandsaw fence to about 3/8 of an inch so we could rip at least two pieces from each board. Some of the stock was thick enough to get three pieces.
Each board was then planed down smooth and even to a consistent ¼ inch. Then each board was run through the table saw to 3.5 inch width. Why 3.5 inches? No idea. It just sounded good at the time.

Since it was just a nice day outside, Mike decided to set the miter saw up in the sun to make all of the triangles. We secured a stop block to the end of the saw to make this go more quickly and ensure that each piece was uniform. The miter saw is set to 60 degrees and Mike is able to just flip the board after each cut and run it to the stop block for the next cut. It takes a lot of time but really isn’t too difficult.

Then came the worst part. Every single triangle was sanded to 240 grit individually. Then we took each one to the belt sander and hit the edge at 45 degree (more or less). This edge would give the finished pattern a nice, 3-dimensional look. More importantly, it would hide all the imperfections that we were sure to make in either the layout or assembly.

The next part took a lot of time but was probably the most fun and rewarding. We drew a line from top to bottom dead center of our workspace and started laying out the pattern. We secured each piece with three pin nails and a heck of a lot of wood glue.

Finally, to cover any gaps we might have and to give the bar a more polished, fancier look, we added some tiny oak pencil trim.


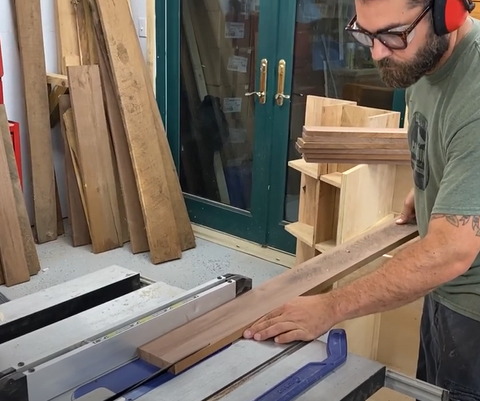
To make the bar top we used some 5/4 rough cut walnut. We had this piece in the barn loft for a couple of years. It was a massive 16 inch wide by 12 ft long piece that had just been waiting for the right project to come along. Since it was so long, we decided to cut right triangles out of it so the sides would essentially swing in to make our U shape. This would allow the grain pattern to turn and follow through the whole bar.
To get the pieces started we set up an extended fence on our table saw by just clamping a longer piece of lumber to the existing fence. Prior to cutting our triangles we jointed what appeared to be the straightest edge so now we needed a uniform width. Our short edge needed to run against the fence which made getting it started flush difficult. The extended fence solved the problem easily.


Again, we pulled out our handy pocket hole jig and drilled the holes on the bottom of each side piece. Pocket screws have a tendency to draw up once side so we made sure to clamp both pieces to our work table so we could avoid that…….a step we sometimes forget. A quick couple of screws in each side with some good wood glue and we are all set.
So now we have a nice, square walnut bar top. This particular bar had a logo engraved in the top by request of the customer. We engraved it on our CNC router and filled it with epoxy but that’s a whole different blog post.

For the bottom section of the bar we choose a wipe on poly and just rubbed in the finish in thin layers. We used two coats.


For the top we chose Rubio Monocoat with the optional hardener. This stuff is the best. We’ve used every finish known to man….even made some of our own….and honestly nothing compares to Rubio. You just mix the oil with the second stage hardener to the ratio provided and apply a small amount and squeegee it on. A little goes a long way and we probably, honestly over mixed for this top. Once the monocoat is spread evenly all you have to do is rub it in well, wait a few minutes, then buff it back out until your towel is clean. That’s it! Most woods take one coat but since this bar top would see a lot of use and walnut tends to soak up oil, we actually applied a second coat for good measure.


Next came the counter for the bar. We were very lucky and found a used piece of beautiful granite at a local restore for $40 and couldn’t pass it up. The only problem was that our bar and ice chest were both about 20 ½ inches deep and the granite was wider. It was also a bit long, so we decided to cut it ourselves. This part was entirely experimental and I’ll tell you we absolutely hated doing it.
We had a masonry wheel for an angle grinder from a previous project and thought we would try that on the granite. We filled a spray bottle with water to try to keep the top wet and keep the dust down. That didn’t work too well. We should have had a tripod for the camera so one of us could constantly spray the top with water but hey…..we have a woodshop….not a granite shop…..so what do we know?
Following our sharpie line, we cut the granite length and then to width making multiple shallow passes until we were finally able to tap it with our mallet and knock off the edge.
A quick wipe down to get all the dust off the counter and we are ready for install.


You’ll notice here that our ice chest is now on the opposite side. We noticed, after cutting the granite that we had only one polished end and it wasn’t the one we wanted. We just slid the chest to the other end and no one would ever know. Using a line of silicone we secured the counter to our frame. We had also added couple of 2x4 braces to hold the weight in the center. Fits like a glove.
To cover any jagged edges from our not-so professional granite cuts we installed a piece of ceramic tile trim. This gave the counter a polished look and really tied the whole bar together.

The absolute last thing to do was add the speed rails to the front. We found these online and decided to add one to each side, leaving the center open so the bartender doesn’t have to reach over the bottles to mix a drink. A happy bartender is very important.


And there we have it. One 3 dimensional, portable, rolling bar of happiness.